

Now that the insulation is in place we’re almost at the point where we can pour the concrete slab and finish the foundation but first the in floor radiant heating needs to be put in place. But first, we need to mark out the inside walls to make sure we don’t place any tubing in the wrong place.
Marking the inside walls
We were expecting some rain between the day we did this and when we would place the in floor heating so we decided to not just spray mark the inner walls but also use red line pegged to the foundation.
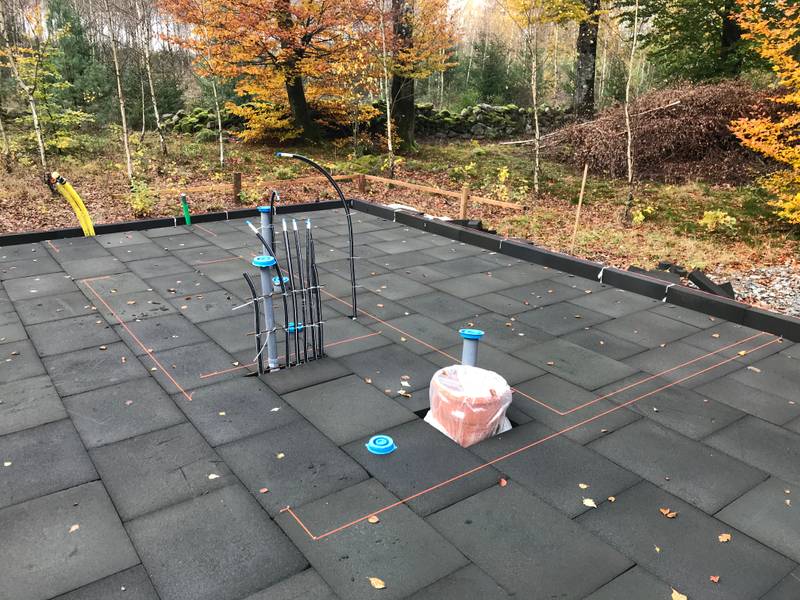 The inner walls marked with red bricklayers line.
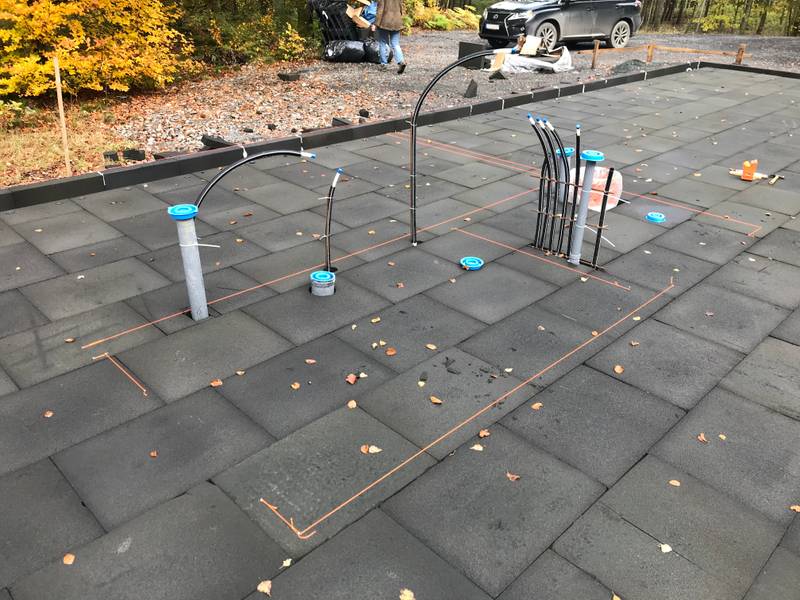 Another angle showing the inner walls. The gaps between the pipes sticking up and the foam glas insulation will be sealed later with spray foam.
Once we had at least one side of each inner wall marked out we sprayed them all making it very easy to see the inner walls. Since we could now see the inner walls clearly it was quite exciting to finally get some feel of the size of all rooms.
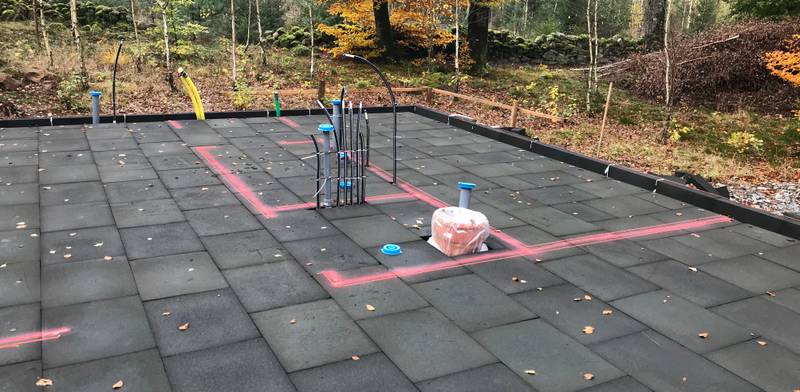 Now we can clearly see the size of the various rooms in the workshop.
 Another angle showing the toilet.
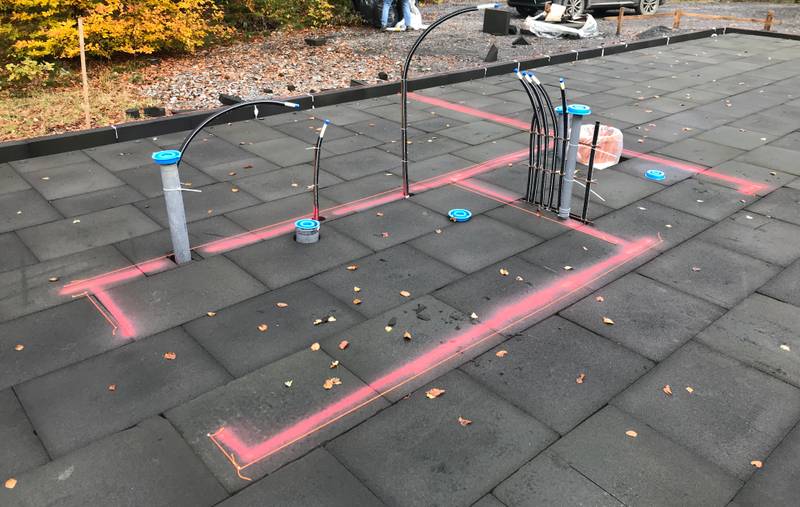
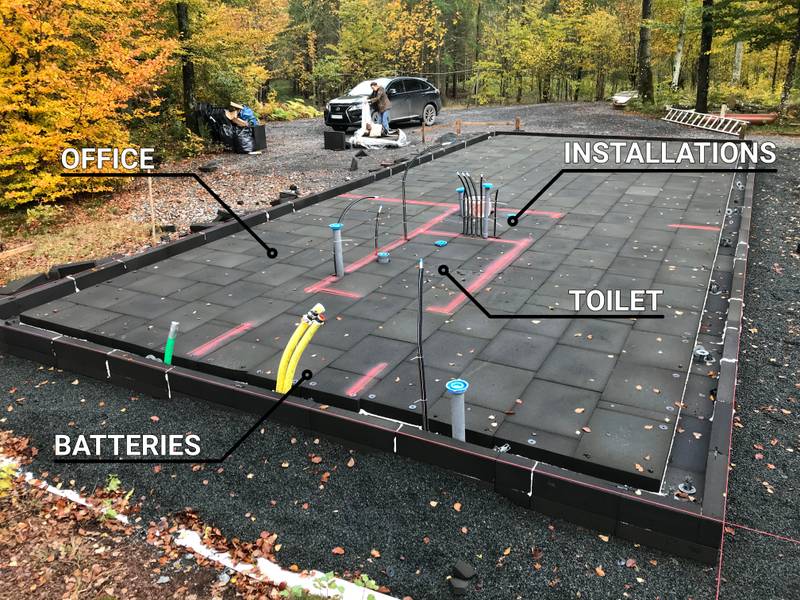 These are the various rooms in the workshop. The remaining area will be used as a workshop for various fun stuff we’ll come up with.
Hot water pipes
Usually you put the hot water pipes below the top insulation layer but since our insulation is only 200mm thick we decided to put the hot water pipes just below the tubing for the radiant floor heating. We used a drill with a 25mm wide bit to hollow out the insulation for the hot water pipes. The image below shows the 3 hot water pipes going from the distribution panel to the shower and sink inside the toilet as well the sink inside the workshop.
 With a power drill and a 25mm wide bit it was easy to hollow out the foam glas for the hot water pipes.
The radiant floor heating
Before we could put down the actual tubing we started, or we should say they as we got professionals to help us with this, laying the rails. We had some issues getting the rails to stick to the foam glas insulation but after trying out a few different methods we found a way that we hoped would work.
The rails were then used to hold down the tubing as it was rolled out across the entire future floor. All tubes were connecting to a central distribution panel close to where the pellet heater will be placed.
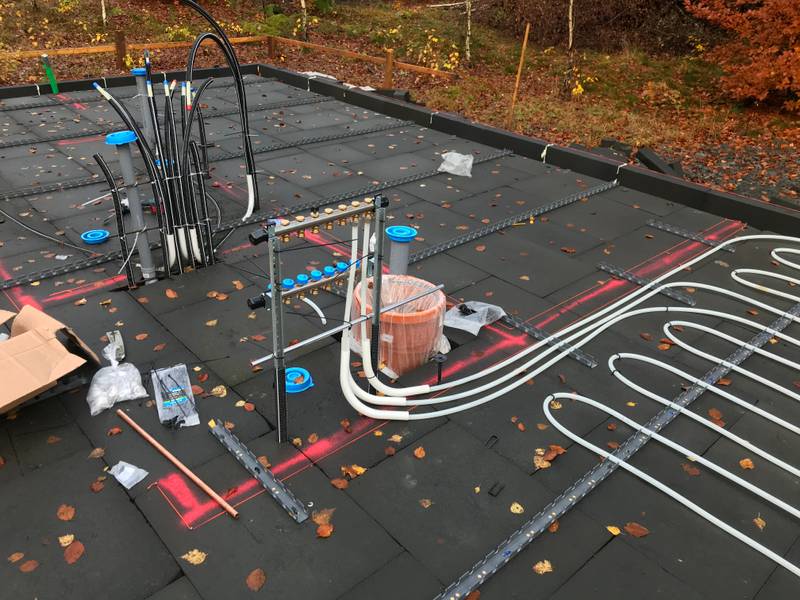 The distribution panel with some of the radiant tubing connected.
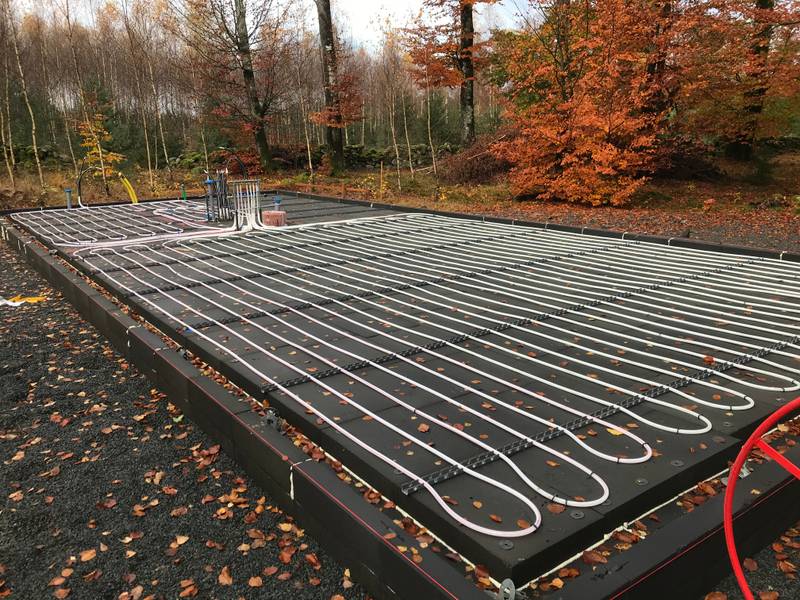 Almost there!
Unfortunately we got no photos of the finished work but it’s just more heating pipes also covering the office. All in all the work was done in about 5-6 hours by 2-3 people. Before pouring the slab we’ll try to remove as much of the leaves as possible but from what we’ve been told, it would not make much difference if a few leaves are caught in the concrete once poured.
Next up is pouring the slab. Looking forward to getting that done and planning the framing of the workshop!