

Up until this point we’ve only had some simple boards to cover the small doors and the larger one at the east gable end has only had a sheet of plastic stopping people and animals from getting in. We commissioned the local carpenter to help build the doors and together we installed them.
Installing the smaller doors
The smaller doors were built with a pre-made frame that fit the 2 doors. The right door is the larger of them and is supposed to be the main entrance to the workshop when going between the main house and the workshop. The total opening is about 1.6m (about 5.2 feet) wide with the smaller door at about 60cm (2 feet) wide and the larger 1m (3.3 feet) wide.
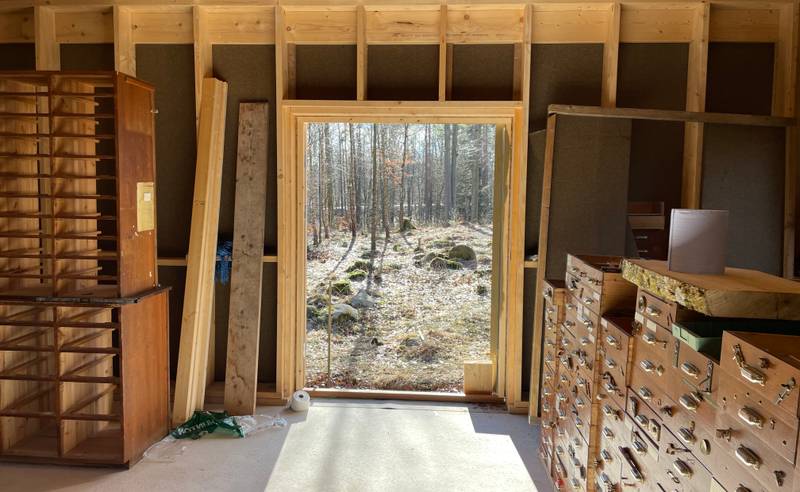 This is the view towards where the main house will be. This is also where two smaller doors are installed.
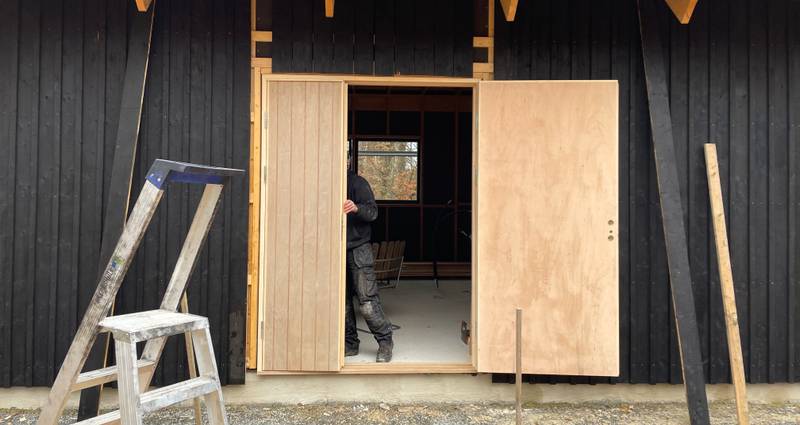 The unpainted doors installed. The door blades are 65mm thick with a foam core as insulation.
 The smaller doors installed and ready for paint. Contrasting great against the charred facade.
Painting the doors
As we we’re sketching out the workshop and the main building we put down a few rules or concepts that we should adhere to. One of them was to only paint the main door of each house and have the other doors of the houses blend in with the charred facade.
So, the smaller doors being the main entrance they got treated with a green paint based on boiled linseed oil. We had found the color we wanted but had no color code for it so we asked a paint shop close by (Enetorps Byggnadsvård) to mix something as close to our sample as possible.
The color they fixed came out really nice. While the end results is usually great when it comes to paints based on boiled linseed oil, it does take some time to dry. Super happy with the result even though this is just the first layer of mist likely three.
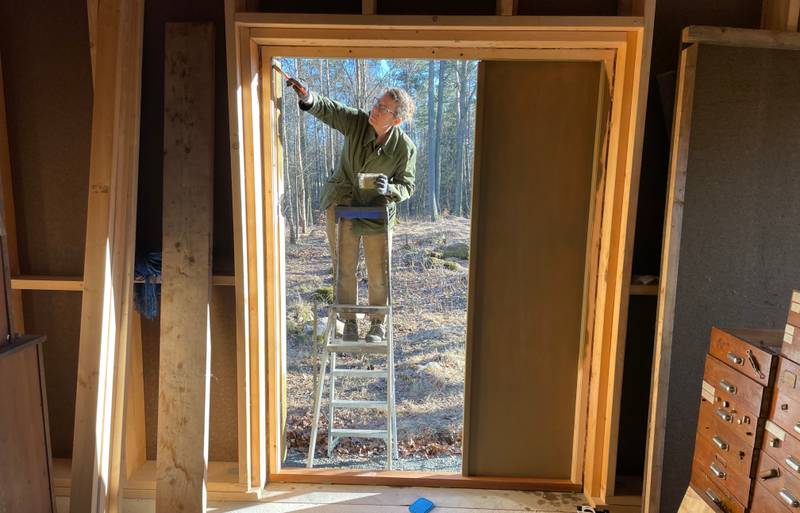 Sofia painting.
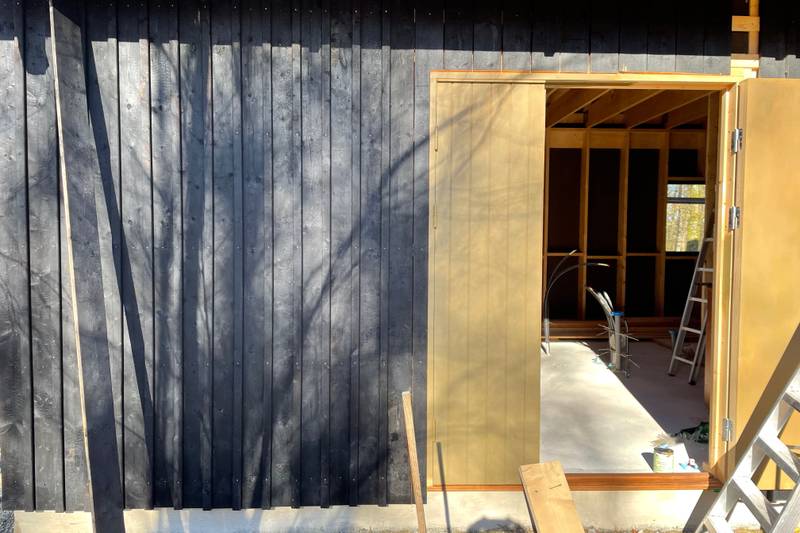 First layer of paint done.
 Two more layers of paint and some trim and we’re done.
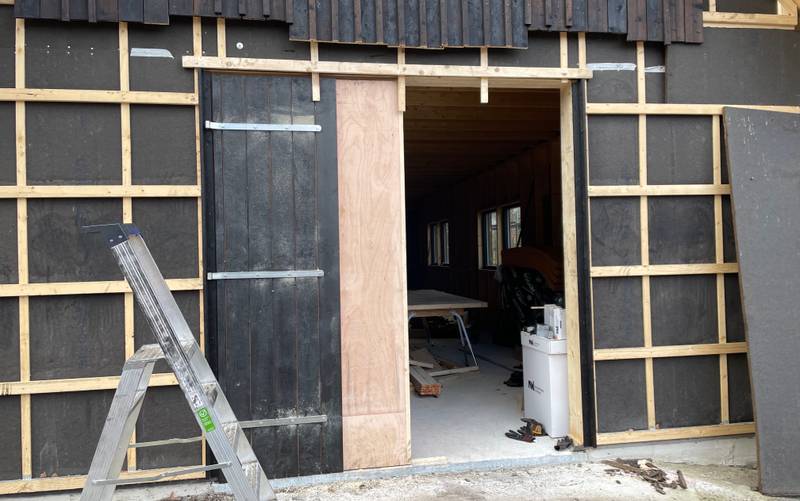
Installing the large barn doors
Getting the larger barn doors was going to be a somewhat bigger project as we only had 2 large door blades made and the frame was supposed to be the frame of the workshop. The opening is roughly 2.3m (7.5 feet) wide and 2.8m (9.2 feet) high.
First step was to install charred planks on the bare door blades so that they would blend in with the facade after installation. Not a very hard job but the added weight really made them hard to handle.
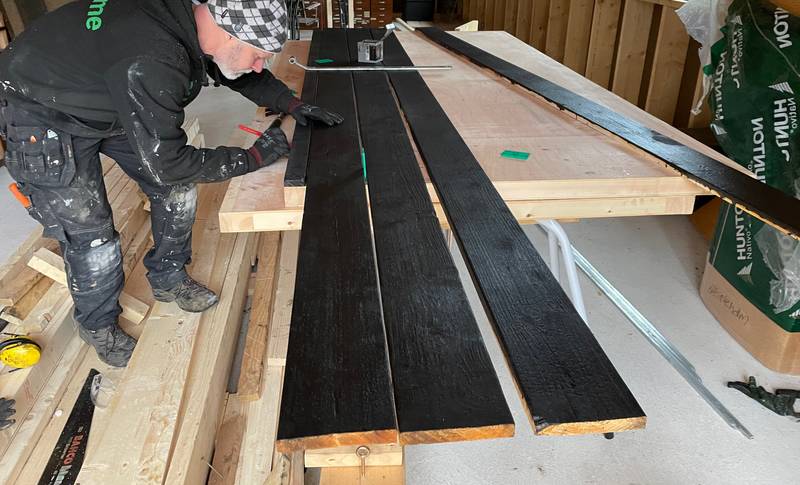 Installing the charred planks on the bare barn doors.
 We had to do some minor trimming as the doors were made slightly oversized. Once trimmed we sat it in place ready to mount the hinges.
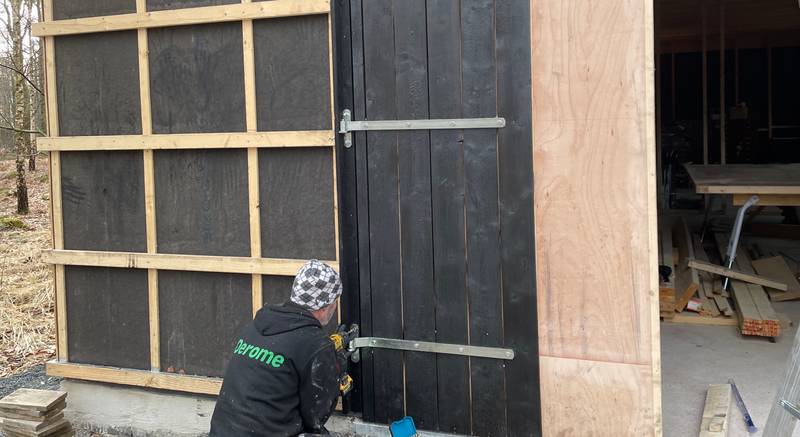 The heavy barn doors were mounted with large hinges and through bolts to really stay in place over time. Really hope they won’t sag over time.
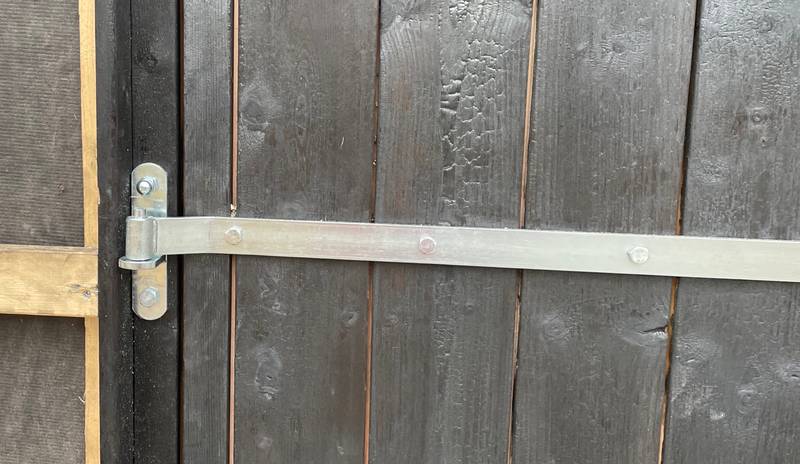 Closeup of one of the three hinges. One large bolt going through the frame fully at the top and a large screw at the bottom should be sufficient.
We decided to only install the planks that would need to be behind the hinge-arms. The rest will be install once the cladding is in place around the entire door so that we can match up the planks properly. The idea is to have this door blend in as much as possible with the charred facade.
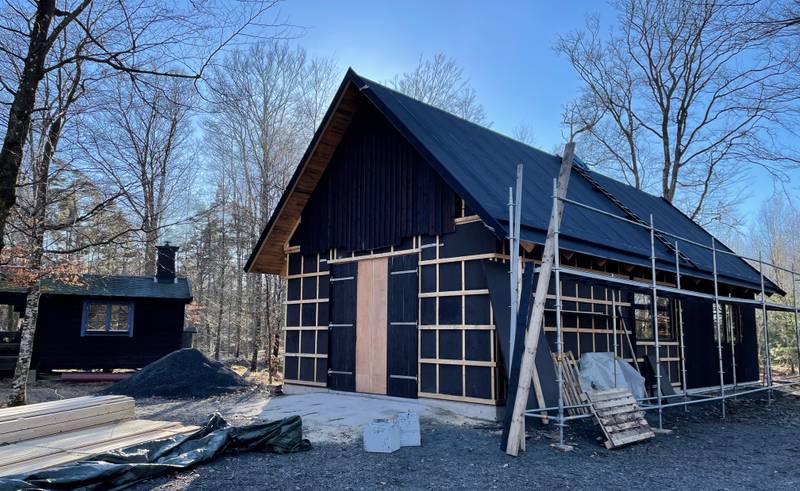 Both barn doors installedt.
Closing thoughts
We did this over a few hours over 2 days. The smaller doors was a breeze to install but the barn doors required a bit more work to get in place. Next time I’d consider doing even these large doors with a frame instead of using the building itself as a frame for the door.
Either way, the end result is very please. While not completely done we can now close and lock up with workshop, which is really really nice.